Thursday, August 13, 2009

Quesadillas de Turquía!

Hola! Ok for those that do not know Spanish its OK...calm down...I will translate for you! This recipe is for Turkey Quesadillas! Hubby and I are avid fans of Mexican food although we have yet to find a really good place in Charlotte other than Los Arcos in the University Area. He commissions either taquitos or quesadillas at least once a week which I love to make because Mexican food is really easy to make and really filling. Quesadillas are a pretty easy meal to make and you can make it with any meat such as ground turkey, ground beef, shredded chicken, shredded beef or pork....the possibilities are quite endless. We tend to stick to the turkey or the chicken because they are the healthiest options.

I recommend serving it with lettuce shreds, diced tomatoes, sour cream and salsa! You can never go wrong there.
We really enjoy Zatarains Spanish Rice which is really good and Daisy Sour Cream. Ok....these are my personal favorites but you can use any brand you like.

AND


Now without further ado.....the recipe....

Ingredients
  • 1 package of small or medium flour tortillas (You can adjust this according to your needs and how many you are feeding)
  • 1 package of lettuce shreds
  • 1 medium tomato (diced)
  • 1 package of taco seasoning
  • EVOO for cooking the meat
  • 1 lb of ground turkey/ground beef/ground pork
  • Daisy Sour Cream
  • 1 pacakge of Mexican Blend cheese
  • 1 small onion finely diced
  • 2 tsp of minced garlic
Directions
  • Preheat your oven to 300 degrees
  • In a large skillet start to brown your meat, continually breaking it up as it cooks. If you are using ground turkey, add the EVOO, one turn of the pan to help the meat cook. Season with salt and pepper.
  • After about 5 minutes add your onions and garlic to the browning meat mixture and cook until no longer pink.
  • Once the meat is done cooking, if using ground turkey, no need to drain. If using the pork/beef drain the excess fat from the pan.
  • Sprinkle the Taco seasoning over the meat and taste. I use about 1/3 of the pack as the seasoning is full of salt. If you like a stronger flavor follow the directions on the seasoning packet and add to the meat. *DOING THIS WILL MAKE THE MIXTURE WETTER*
  • Place a tortilla on the bottom and layer with cheese. Add enough meat mixture on the top to cover the cheese. Top with more cheese and press down to seal.
  • Continue to do this until all the meat mixture is gone
  • Place in oven and cook for about 10-15 minutes or until the tortillas are browned.
  • Take out and serve with the lettuce, tomatoes, sour cream and salsa!

Friday, August 7, 2009

The Oniony Goodness!!!!!!


I

AM

BACK!!!

After much cooking and not enough blogging I am finally updating and adding some new recipes to the blog. So over the course of the summer, I have had to reinvent myself and cook more often which is a good thing. So I decided to tackle Onion Rings because I absolutely love them but depending on where you get them they can be oh so good....and some oh so bad... I figured this could not be a complicated recipe so I concocted one that came out absolutely wonderful! Hubby gobbles them up and he hates onion rings for the most part. So I hope you guys enjoy them!

Ingredients

I will post the ingredient quantities that I used. You will need to adjust according to your needs. This recipe covers 3 people....
  • Vidalia or Regular Yellow Onions - The number of onions will depend on how many onion rings you want to make.
  • 2-3 cups of Buttermilk - This depends on the desired number of onion rings
  • Salt and Pepper
  • 1 Cup of Cornmeal
  • 1 Cup of Flour
  • 1-2 tbsp of hot sauce
Steps

  1. Peel off the covering on your onions and discard. Cut them into 1/4 inch slices (thicker if you prefer but no thinner) and separate carefully.
  2. In a deep bowl combine the buttermilk, salt, pepper, and hot sauce. Place your Onions in the mixture making sure that each is covered with the liquid. Set aside for about 3-6 minutes.
  3. Mix the cornmeal and flour in a paper bag or a large Ziploc bag.
  4. In your fryer or a deep fry pan, heat enough oil, about 3/4 of an inch. Make sure the oil is hot enough.
  5. Working in batches, remove the onions, shaking of the excess buttermilk, and place in the flour mixture.
  6. Remove from the flour mixture, shaking off the excess and fry about 1-2 minutes, turning at least once to brown on all sides. Remove and place on a paper towel to drain excess oil.
  7. Repeat steps 5 and 6 until all onions have been fried.
  8. Enjoy!
POINTERS

  • Do not crowd the fryer. This will cause the onion rings to steam not fry! No one likes soggy onion rings.
  • Feel free to up the ante on the hot sauce if you want them hotter!
  • Se sure to season as soon as they leave the fryer.

Thursday, August 6, 2009

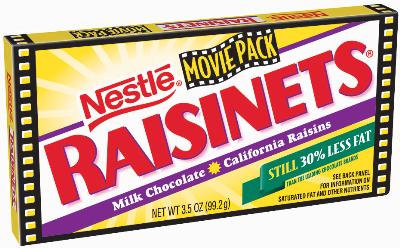
Goobers, Raisinettes, and Graham Crackers


Ha!!!!!!!!!!!

Gotcha...A break from the norm. So I have been cooking up a storm but have been rather lackadaisical about posting the recipes to the blog. *sigh* Forgive me...Hubby and I are working on a major project that requires time, energy, and finessing. The above title is an ode to our favorite snacks that tend to find their way into the kitchen while I am cooking. So snack on those while I compile the latest dishes!